
Do you want your nails to look amazing? Say bye to boring nails and hello to cool nail designs! This guide will teach you how to make your nails look great at home. Whether you’re new to nail art or want to get better at it, this guide has everything you need.
It can be hard to make your nails look like you got them done at a salon. But don’t worry, we’ll explain nail art in a simple way. We’ll give you tips, tricks, and steps to create beautiful designs at home.
From beginner nail art techniques to product advice, nail care tips, and design ideas, this guide has it all. Get ready to unleash your creativity and make your nails look amazing!
What is Nail Art?

Nail art is a popular trend in the beauty world. It lets people show their creativity through cool designs on their nails. Nail art combines painting and decorating nails with different techniques and tools. This results in unique and eye-catching manicures.
Plain, one-color nails are boring. With nail art, you can try endless designs. From pretty flower patterns to bold shapes, and everything in between. Nail art makes your nails look better. It’s also a way to express yourself and show your personality.
One of the exciting aspects of nail art is that it is not limited to professional nail salons anymore. Thanks to the rise of DIY culture and online tutorials, anyone can try their hand at creating beautiful nail art designs in the comfort of their own home. DIY nail art allows you to experiment with different colors, patterns, and techniques, giving you the freedom to customize your manicure according to your preferences.
Engaging in nail art as a hobby also has its benefits. It can be a therapeutic and relaxing activity, allowing you to unleash your inner creativity and provide some self-care. Additionally, it is a cost-effective alternative to frequent salon visits, saving you time and money.
So, whether you’re a nail art enthusiast looking to expand your skills or a beginner eager to dip your toes into the world of DIY manicures, this comprehensive beginner’s guide will equip you with the knowledge and techniques you need to create stunning nail art designs that will make heads turn. Get ready to elevate your nail game and let your creativity shine with the exciting art of nail design.
Getting Started with Nail Art
When it comes to creating stunning nail art designs, having the right supplies and tools is essential. Here’s a brief overview of what you’ll need to get started, along with some tips on proper nail care:
1. Nail Polish: Invest in a range of high-quality nail polishes in various colors and finishes. Look for brands that offer long-lasting formulas and vibrant pigmentation.
You need some supplies to do nail art at home. First, get nail polish in different colors like red, blue, yellow, etc. Next, get nail art brushes of different sizes. These brushes help you make pretty designs on your nails.
Dotting tools are also needed. Dotting tools make small dots and circles on your nails. Use them to make flower designs or polka dots. You also need nail striping tape. Striping tape helps make straight lines on your nails for cool patterns.
A nail stamping kit is good for beginners. It has plates with designs that you can stamp onto your nails. Super easy! And don’t forget nail care products. Get cuticle oil to keep your nails healthy. Use a good nail file and base coat too.
Taking care of your nails is important. Moisture your cuticles often so nail polish lasts longer. Don’t use nails as tools, it can chip the polish. With proper care and these supplies, you can make awesome nail art at home!
Mastering Nail Art Techniques
Nail art takes practice but is fun to learn. Start simple with dots or stripes. As you get better, try more complex designs like flowers or animals. Use different brushes and dotting tools to make your designs unique.
Don’t be afraid to mix colors and try new combinations. Nail art looks coolest when it’s creative and bold. Make designs that reflect your personality and style. Add glitter, gems or stickers to really make your nails pop!
Once you get the hang of freehand nail art, try stamping. Stamping gives you perfect images every time with no skill required. You can even make your own stamping plates with household items like pencil erasers.
The most important part of nail art is practice. Don’t get discouraged if designs don’t turn out right away. The more you practice, the better you’ll get. Have fun and experiment until you find techniques that work best for you!
Nails are a fun way to look pretty. You can decorate them without help. We will learn easy ways to make nail designs. You can make your nails look amazing.
Dotting Technique
Dotting is a simple way to decorate nails. Here are the steps:
1. Put a clear base coat on nails and let it dry.
2. Dip a dotting tool or toothpick into nail polish color.
3. Put dots on nails in any pattern you like.
4. Make different dot sizes by pressing harder or softer.
5. Let dots dry. Then put a clear top coat.
Striping Technique
Striping gives your nails a pretty look. Do this:
1. Put a clear base coat and let dry.
2. Choose two nail polish colors that look nice together.
3. Use a thin brush or nail tape to make lines.
4. Switch colors to make colorful stripes.
5. Let stripes dry fully. Add a clear top coat.
Stamping Technique
Stamping lets you transfer designs onto nails. Here’s how:
1. Paint your nails with a base coat first. Wait until it dries.
2. Apply nail polish of your choice on a stamping plate pattern.
3. Pick up the design from the plate using a stamper tool.
4. Press the stamper gently onto your nails to transfer the design.
5. Use a cotton bud dipped in nail polish remover to clean any excess polish around your nails.
6. Apply a top coat over the design to give it a polished look.
These easy nail art steps let you make pretty designs. Practice often and let your creativity shine through nails. The key is enjoying the process. Have fun with nail art!
Exploring Nail Art Designs
There are so many nail art ideas to try. Here, we’ll look at designs for beginners and experts alike. Experiment with them to show your personal style.
1. Simple and Chic: For a classic, elegant look, choose minimalist nail art. Try one accent nail with a simple pattern or a nude base with subtle shimmer.
2. Playful Patterns: Express your artistic side with fun, whimsical designs. Go for polka dots, stripes, or animal prints. Mix and match patterns for a unique look.
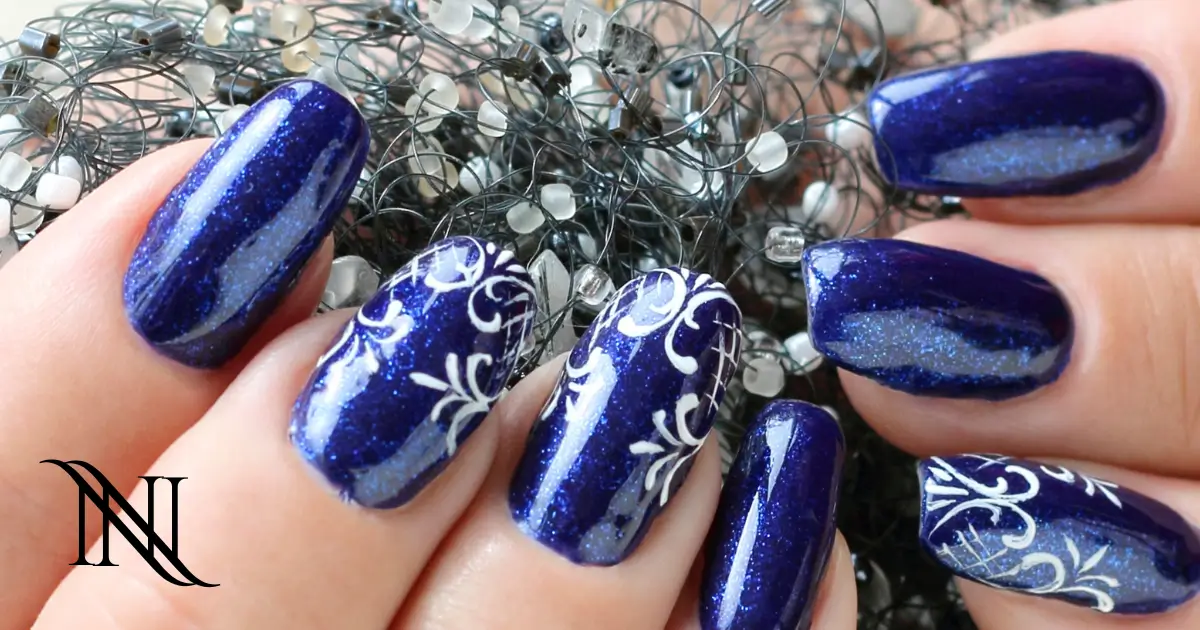
3. Floral Fantasy: Bring nature to your nails with floral art. Pick vibrant flowers or delicate petals for a feminine, romantic style.
4. Make abstract patterns. Use bold hues, empty spaces, and geometric shapes to make modern and artistic designs.
5. Use glittery nail polish. Add glitter to your nails for special events or when you want to look fancy. Cover your nails with glitter or make a glittery gradient.
Keep practicing to improve your nail art skills. Try new techniques and have fun designing your nails. With creativity, you can make salon-quality nail art at home.
Solving Nail Art Problems
Doing nail art can be tricky at times. You may smudge the polish or have chipping problems. Here are some tips to help.
1. Preventing Smudges
– Let each coat of polish dry fully before adding the next one. This stops smudging.
– Use fast-drying top coats or drying sprays to make the polish dry quicker.
– Don’t touch or bump your nails on hard surfaces until they are completely dry.
2. Dealing with Chipping
– Use a base coat before your nail art. This helps it last longer.
– Seal your nail design with a quality top coat to prevent chipping.
– Reapply the top coat every few days to keep your nail art chip-free.
3. Fixing Mistakes
Hey there! If you ever make a tiny mistake while doing your nails, don’t worry. Simply take a cotton swab and dip it in nail polish remover. Use it to gently fix the small area. Easy peasy!
But what if the mistake is bigger? No problem! Just cover it up by adding extra designs or stickers. Covering it up can turn a mistake into a cool new look.
Remember, practice makes progress. Don’t get discouraged if you make mistakes at first. See them as chances to learn and improve your skills.
4. Longevity and Maintenance
Want your nail art to last longer? Be sure to wear gloves when doing chores or activities that could damage your nails. This will protect your hard work.
Another tip: Keep your cuticles moisturized. When they get dry and start peeling, it can mess up your manicure. So, use a cuticle cream or oil regularly.
Lastly, avoid using your nails as tools. This can cause chips and breaks, ruining your beautiful designs. Let’s keep those nails looking fab!
Troubleshooting is normal when doing nail art. Stay patient, follow these tips, and you’ll create long-lasting, amazing designs. You’ve got this!
Taking Your Nail Art to the Next Level
Now that you’ve mastered the basics, it’s time to level up your nail art game. Check out these advanced techniques and trends to create stunning, unique looks.
Gradient Nails
Gradient nails blend colors seamlessly. First, choose two or more complementary shades. Apply the lightest one as a base coat. Then use a makeup sponge to dab the darker shades onto the tips of your nails. Gently blend the colors together for a beautiful gradient effect.
3D Designs
Add some dimension to your nails with 3D designs. Use nail art tools or a toothpick to create raised designs like flowers, bows, or geometric shapes. You can also experiment with different materials like studs, rhinestones, or glitter for a textured look. Finish with a top coat to secure the 3D elements.
Nail Stamping
Nail stamping helps you quickly add cool designs to your nails. Get a nail stamping kit with plates that have different designs. Also get a stamper and scraper tool. Put nail polish on a design you like. Scrape off the extra polish. Press the stamper on the design. Then roll the stamper over your nail to transfer the design.
Negative Space Nails
Negative space nails show off your natural nail color. It looks modern and stylish. Use striping tape or nail vinyls to make geometric shapes. Or create cut-outs to expose parts of your nail. Fill the exposed areas with different colors. Or leave them bare for a simple look.
Keep practicing new techniques to find what works best. With these cool nail art trends, your nails will stand out. So get creative and have fun!
Maintaining Your Nail Art
To keep your nail art looking fresh and vibrant for longer, follow these tips for healthy nails:
1. Protect Your Nail Art: Apply a clear top coat over your design. It seals and guards against chipping or fading.
2. Moisturize Your Cuticles: Put cuticle oil or moisturizer on your cuticles daily. This stops dryness and peeling around your nail art.
Protecting your beautiful nail designs is very important. Wear gloves when doing chores or using harsh chemicals. This prevents damage to your nail art from chemicals. It also reduces the risk of chipping or lifting.
Do not pick or bite your nails. This can cause serious damage and ruin your lovely designs. Resist the urge to do so.
Maintain your nail art regularly. Trim and shape your nails. Touch up any minor chips with nail polish or a fine brush. This helps keep your nails looking great.
Following these simple tips lets you enjoy your stunning nail art longer. You’ll also keep your nails healthy. A little care goes a long way for fabulous DIY nail art.
Resources for Nail Art Inspiration
Need nail art ideas? Check out these websites and social media for inspiration:
– Pinterest: Pinterest has many nail art pictures and tutorials. Explore boards for different themes and techniques.
– Instagram: Follow popular nail artists and influencers. See new trends, creative designs, and step-by-step guides.
– YouTube: Watch DIY nail art videos on YouTube. Talented artists share detailed tutorials and tips. Subscribe to channels like [Sarah’s Nail Art](link) and [Polish Nails](link).
– Blogs: You can find cool nail art ideas on blogs like [Nail Art Galore](link) and [Nail Art Obsession](link). These blogs show you step-by-step how to make trendy nail designs. They have lots of photos too.
Look around for nail art inspiration! Check out magazines, fashion shows, and even things in nature. Try new designs and techniques. It’s fun to be creative with your nails!
Conclusion
Nail art lets you express yourself in a fun way. Now you know the basics for making pretty DIY nails at home. Keep exploring new designs and trends. Take good care of your nail art so it lasts longer. Get creative – there are endless nail art possibilities!
Follow Nailnovella.com